Difference between revisions of "Custom Reports"
| Line 51: | Line 51: | ||
| − | Name: Name of the Report | + | '''Name''': Name of the Report |
| − | Date Mode: Rolling is last X days. Static is for a set period time like the past month. | + | '''Date Mode''': Rolling is last X days. Static is for a set period time like the past month. |
| − | Start Date Offset: If using rolling, select how many days back to start reporting. | + | '''Start Date Offset''': If using rolling, select how many days back to start reporting. |
| − | Number of Days: If using rolling, select number of days to include in report. | + | '''Number of Days''': If using rolling, select number of days to include in report. |
| − | Send Schedule: Select to have report generated and sent weekly or monthly. | + | '''Send Schedule''': Select to have report generated and sent weekly or monthly. |
| − | Week Days: Select days to include in report. If closed on weekend, Saturday and Sunday would not need to be selected. | + | '''Week Days''': Select days to include in report. If closed on weekend, Saturday and Sunday would not need to be selected. |
| − | Included Sales Reps: Select the sales reps to appear on the report. | + | '''Included Sales Reps''': Select the sales reps to appear on the report. |
| − | Report Recipients: Select reps and managers to receive the report. | + | '''Report Recipients''': Select reps and managers to receive the report. |
| − | Additional Recipients: Add any others emails that need a copy of the report. | + | '''Additional Recipients''': Add any others emails that need a copy of the report. |
Click SAVE within the top section to save changes. | Click SAVE within the top section to save changes. | ||
Revision as of 15:24, 22 April 2014
Path: Website - Navigation Bar - Stats - Custom Reports
Managers can create custom reports to view activities within CallProof. These can be mailed on a schedule to anyone.
Custom Reports Index
The Custom Reports screen shows an index of custom reports currently saved in the users CallProof account.
The Position Arrows are used to organize this screen and the order in which reports are listed.
The Report Name column shows the name and can be clicked to edit the custom report.
The Last Run column holds the last generated copy of that report. Click on this will allow users to view the report, as well as save a local copy to their system.
The next set of icons let users edit, run, duplicate, archive, or delete a report.
![]() Create a duplicate of existing report
Create a duplicate of existing report
![]() Archive report. Will not be seen here, but will still be saved in CallProof
Archive report. Will not be seen here, but will still be saved in CallProof
![]() Delete report. This cannot be undone and users will have to verify when deleting.
Delete report. This cannot be undone and users will have to verify when deleting.
Add New Report
To create a new report, click on the ADD REPORT near top right of the report index page.
Name the report and click SAVE.
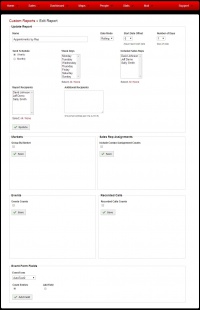
Next, create the actual report. Select what needs to be reported, who receives it, and when. This can be edited at any time from the Custom Reports index screen.
Each section of the form is independent. If a change is made within a section of this page, click SAVE to update the report. Each section is contained within a border. If a change is made, click save within that section or changes will be lost.
Name: Name of the Report
Date Mode: Rolling is last X days. Static is for a set period time like the past month.
Start Date Offset: If using rolling, select how many days back to start reporting.
Number of Days: If using rolling, select number of days to include in report.
Send Schedule: Select to have report generated and sent weekly or monthly.
Week Days: Select days to include in report. If closed on weekend, Saturday and Sunday would not need to be selected.
Included Sales Reps: Select the sales reps to appear on the report.
Report Recipients: Select reps and managers to receive the report.
Additional Recipients: Add any others emails that need a copy of the report.
Click SAVE within the top section to save changes.


