Custom Reports
Path: Website - Navigation Bar - Stats - Custom Reports
Managers can create custom reports to view activities within CallProof. These can be mailed on a schedule to anyone.
Custom Reports Index
The Custom Reports screen shows an index of custom reports currently saved in the users CallProof account.
The Position Arrows are used to organize this screen and the order in which reports are listed.
The Report Name column shows the name and can be clicked to edit the custom report.
The Last Run column holds the last generated copy of that report. Click on this will allow users to view the report, as well as save a local copy to their system.
The next set of icons let users edit, run, duplicate, archive, or delete a report.
![]() Create a duplicate of existing report
Create a duplicate of existing report
![]() Archive report. Will not be seen here, but will still be saved in CallProof
Archive report. Will not be seen here, but will still be saved in CallProof
![]() Delete report. This cannot be undone and users will have to verify when deleting.
Delete report. This cannot be undone and users will have to verify when deleting.
Add New Report
To create a new report, click on the ADD REPORT near top right of the report index page.
Name the report and click SAVE.
Next, create the actual report. Select what needs to be reported, who receives it, and when. This can be edited at any time from the Custom Reports index screen.
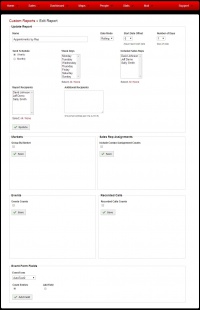
Each section of the form is independent. If a change is made within a section of this page, click SAVE to update the report. Each section is contained within a border. If a change is made, click save within that section or changes will be lost.
UPDATE REPORT
Name: Name of the Report
Date Mode: Rolling is last X days. Static is for a set period time like the past month.
Start Date Offset: If using rolling, select how many days back to start reporting.
Number of Days: If using rolling, select number of days to include in report.
Send Schedule: Select to have report generated and sent weekly or monthly.
Week Days: Select days to include in report. If closed on weekend, Saturday and Sunday would not need to be selected.
Included Sales Reps: Select the sales reps to appear on the report.
Report Recipients: Select reps and managers to receive the report.
Additional Recipients: Add any others emails that need a copy of the report.
Click SAVE within the top section to save changes.
Markets
This section allows reports to group reps by employees if Markets are being used. By default, Markets are not used within CallProof by many clients.
When checked, the user can select the Markets to include in the report.
If using Markets and report is to group results by Market, select this checkbox and click SAVE.
Sales Rep Assignments
Checking this box will add a column to the custom reports showing how many new contacts were assigned to a rep during the reporting period. This can be useful to see how many new prospects or leads were generated during the reporting period. This might also be used to see how many unassigned contacts a rep is contacting and taking ownership.
If any changes are made here, click SAVE immediately underneath the checkbox.
Events
Checking the Events Counts checkbox will show a list of events that occur within CallProof. These includes events such as making outbound calls, appointments, followups scheduled, clock ins, etc.
After checking the Events Counts checkbox, select the activities to be included in the report. The final report will show a sum total of how many times each activity occurred within the report time period.
Remember to click SAVE immediately below the Events list to save any changes.
Recorded Calls
Clients of CallProof that utilize VOIP service to make and receive calls with CallProof can select this checkbox. When checked, a new column will appear on the custom report showing a sum total of recorded calls made by the sales rep.
If any changes are made, remember to click SAVE immediately underneath it.
Event Form Fields
This section allows reporting on Event Forms that are entered into CallProof.
Select the Event Form to report on.
Select Count Entries to add a column with total number of times the specified Event Form was entered during the reporting period.
Select the Event Form field to work with under Add Field. Options to count, sum the values, or average the values will be given just below. Example: If an Event Form was entered every time a product was sold, selecting the Total Invoice field here and a Field Action of sum would total up all the invoices and present a grand total on the report.
Field Action
If a field is selected from an Event Form, select how to report on this field. Count will present the number of times the field was filled out. Sum will add all the entries in this field and present the sum total. Average will present the average of all entries in the selected field.
If changes are made and a field is to be added, make sure to click ADD FIELD to save.
Edit Report
To edit a report, select the report name or click the edit icon on the Reports index page.
The full report creation screen will be presented. Make changes as needed.
If changes are made in any section, make sure to click SAVE within that section.


