Email Sync Setup
Path: Callproof Support - Google Calendar Integration
Contents
Beta Notice
This feature is currently in beta testing. Users may experience encounter a bug and are encouraged to email Support with detailed descriptions of the problem. Support will assist in resolving the issue. This page will also be updated as testing continues and may include changes to procedures or features.
What is Email Sync Integration?
CallProof can now be configured to poll email accounts and find emails with known CallProof contacts. Specified folders will be searched and any emails that match a contact's email will be saved within their contact record. All other email is ignored.
CallProof uses IMAP email servers to sync emails. Most email providers supply imap servers with SSL (encryption). Common providers are listed below. Users may need to contact their IT department, manager, or CallProof support to get their IMAP server details.
Setting Up Email Sync
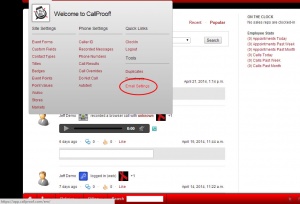
To setup Email Sync on your account, log into the CallProof website. Once Logged in, select HOME > Email Settings
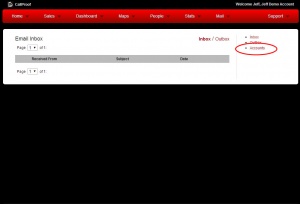
On the Email Inbox screen, click on the Accounts option to access your email accounts settings to add a new one.
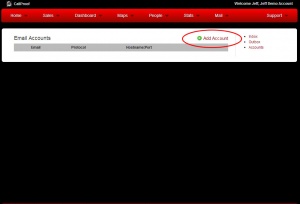
On the Email Accounts screen, click on an email to edit configuration. If first time setting up Email Sync, select Add Account to add your email address.
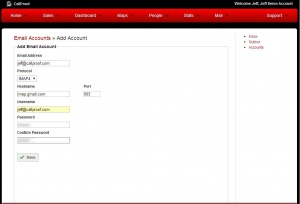
On the Add Email screen, fill out details for the user's email address. Click submit to save. Remember, CallProof uses IMAP email servers.
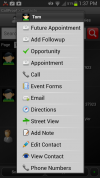
To begin configuring Google Calendar from the mobile app, select any contact and choose "Future Appointment".
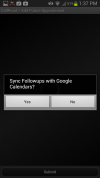
A pop up with ask "Sync Followups with Google Calendars?" Select YES.
Google will now be contacted and ask for the user login credentials. This is all handled on Google's side and Callproof cannot see or access any information used here.
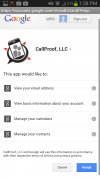
After logging into Google, a permissions page will be displayed. This shows the information that Callproof is requesting from Google. Select ACCEPT on the bottom right of this page. After select accept, the user will return to the Callproof app.
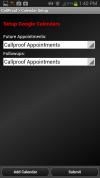
Select the calendar for Callproof to use. In Google Calendars, multiple calendars can be setup for different work. social, or personal needed. Creating a new calendar will separate Callproof events from other events in the user's Google Calendar. Users can use their default calendars or create a new Callproof calendar.
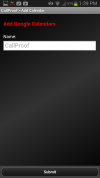
To create a new calendar, select Add Calendar on the bottom left. The user will be prompted for the calendar name. For this demo, we used Callproof Appointments. Click Submit on the bottom to save.
Now, Callproof will once again what calendars to use. Select the calendar to use for Future Appointments and Followups. Click submit to save choices.
Once these steps are completed, user will return to the Callproof app.
Setting Up Google Calendars on the Callproof Website
To setup Google Calendars from the website go to Contacts. To the right, select the Future Appointment button.
On the Future Appointments Screen, select Google Calendar on the right hand side.
Next, sign into Google to allow Callproof to post events to Calendars.
Confirm that Callproof can post events to Google Calendar.
Now, the user is asked to select the calendar they want to use. Google Calendar can be configured with multiple calendars for different types of events. If the user's gmail address is only used for work, we suggest selecting their gmail account. (Example: XXX@gmail.com) If a new calendar is needed, the bottom half of the screen can be used to create a new Calendar. Simply type the name and click submit under the new name. The calendar will be created and can now be selected for Future Appointments and Followups.
At this point, Google Calendars are setup correctly and can be used as needed. Return to contacts and begin creating future appointments by refering to the first screen. Click the future appointment icon to add a future appointment.
Adding a Future Appointment on Mobile
To add a Future Appointment to Callproof and send it to a Google Calendar, select a contact. From the contact menu, select Future Appointment.
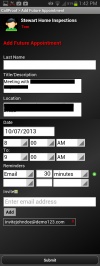
Configure the future appointment as needed. Include any information needed in the calendar entry.
To include an invitee, enter their email and click add. Once it shows under the input box in a square, they have been added. At this time, Callproof can only add invitees to your calendar entry. To send the other invitees an email about the meeting, please log into Google Calendar on a PC, select the event, and then email invitees (about half way down on the right side).
Different options appear for meeting notifications. Select the method and how far in advance to see the reminder. Click the green + sign right of the time to add additional reminders.
After clicking Submit, the calendar entry will be saved to the selected calendar.
Future appointments can be quickly seen by selecting "Followups", then "Appt History", then click Future at the top. This will display all appointments that were setup as future appointments.
